Hyperf 初体验 之 JSON RPC
作者: hedeqiang
发布时间: 2021-11-22 14:04:59
JSON RPC 是一种基于 JSON 格式的轻量级的 RPC 协议标准,易于使用和阅读
服务有两种角色,一种是
服务提供者(ServiceProvider),即为其它服务提供服务的服务,另一种是服务消费者(ServiceConsumer),即依赖其它服务的服务,一个服务既可能是服务提供者(ServiceProvider),同时又是服务消费者(ServiceConsumer)。而两者直接可以通过 服务契约来定义和约束接口的调用,在Hyperf里,可直接理解为就是一个接口类(Interface),通常来说这个接口类会同时出现在提供者和消费者下。
首先使用 skeleton 安装框架,作为 服务提供者 (服务端)
composer create-project hyperf/hyperf-skeleton hyperf-provider 安装过程(省略部分...)
Creating a "hyperf/hyperf-skeleton" project at "./hyperf-provider"
Installing hyperf/hyperf-skeleton (v2.2.2)
  - Installing hyperf/hyperf-skeleton (v2.2.2): Extracting archive
Created project in /Users/hedeqiang/php/Code/Hyperf/hyperf-provider
> @php -r "file_exists('.env') || copy('.env.example', '.env');"
> Installer\Script::install
Setting up optional packages
Setup data and cache dir
Removing installer development dependencies

  What time zone do you want to setup ?
  [n] Default time zone for php.ini
Make your selection or type a time zone name, like Asia/Shanghai (n):
Asia/Shanghai

  Do you want to use Database (MySQL Client) ?
  [y] yes
  [n] None of the above
  Make your selection or type a composer package name and version (yes): y
  - Adding package hyperf/database (~2.2.0)
  - Adding package hyperf/db-connection (~2.2.0)

  Do you want to use Redis Client ?
  [y] yes
  [n] None of the above
  Make your selection or type a composer package name and version (yes): y
  - Adding package hyperf/redis (~2.2.0)
  - Copying config/autoload/redis.php

  Which RPC protocol do you want to use ?
  [1] JSON RPC with Service Governance
  [2] JSON RPC
  [3] gRPC
  [n] None of the above
  Make your selection or type a composer package name and version (n): 1
  - Adding package hyperf/json-rpc (~2.2.0)
  - Adding package hyperf/rpc (~2.2.0)
  - Adding package hyperf/rpc-client (~2.2.0)
  - Adding package hyperf/rpc-server (~2.2.0)
  - Adding package hyperf/service-governance (~2.2.0)

  Which config center do you want to use ?
  [1] Apollo
  [2] Aliyun ACM
  [3] ETCD
  [4] Nacos
  [n] None of the above
  Make your selection or type a composer package name and version (n): n

  Do you want to use hyperf/constants component ?
  [y] yes
  [n] None of the above
  Make your selection (n): y
  - Adding package hyperf/constants (~2.2.0)
  - Copying app/Constants/ErrorCode.php
  - Copying app/Exception/BusinessException.php

  Do you want to use hyperf/async-queue component ? (A simple redis queue component)
  [y] yes
  [n] None of the above
  Make your selection or type a composer package name and version (n): y
  - Adding package hyperf/async-queue (~2.2.0)
  - Copying config/autoload/async_queue.php
  - Copying app/Process/AsyncQueueConsumer.php
  - Copying app/Listener/QueueHandleListener.php
  - Copying config/autoload/redis.php

  Do you want to use hyperf/amqp component ?
  [y] yes
  [n] None of the above
  Make your selection or type a composer package name and version (n): y
  - Adding package hyperf/amqp (~2.2.0)
  - Copying config/autoload/amqp.php

  Do you want to use hyperf/model-cache component ?
  [y] yes
  [n] None of the above
  Make your selection or type a composer package name and version (n): y
  - Adding package hyperf/model-cache (~2.2.0)
  - Copying app/Model/Model.php
  - Copying config/autoload/databases.php
  - Copying config/autoload/redis.php

  Do you want to use hyperf/elasticsearch component ?
  [y] yes
  [n] None of the above
  Make your selection or type a composer package name and version (n): y
  - Adding package hyperf/elasticsearch (~2.2.0)

  Do you want to use hyperf/tracer component ? (An open tracing protocol component, adapte with Zipkin etc.)
  [y] yes
  [n] None of the above
  Make your selection or type a composer package name and version (n): y
  - Adding package hyperf/tracer (~2.2.0)
  - Copying config/autoload/opentracing.php
......
然后拷贝一份 作为 服务消费者(客户端)
cp -r hyperf-provider hyperf-consumer开始搭建 服务提供者
cd hyperf-provider/
mkdir -p app/JsonRpc
我们拿官方文档的 CalculatorService 类来举例
新建 app\JsonRpc\CalculatorServiceInterface 接口
<?php

namespace App\JsonRpc;

interface CalculatorServiceInterface
{
    public function add(int $a, int $b): int;
}
然后创建 app\JsonRpc\CalculatorService 类 继承 CalculatorServiceInterface 接口
<?php

namespace App\JsonRpc;

class CalculatorService implements  CalculatorServiceInterface
{
    public function add(int $a, int $b): int
    {
        return $a + $b;
    }
}
然后需要使用 @RpcService 注解,将 CalculatorService 类发布出去
<?php

namespace App\JsonRpc;

use Hyperf\RpcServer\Annotation\RpcService;

/**
 * @RpcService(name="CalculatorService", protocol="jsonrpc-http", server="jsonrpc-http")
 */
class CalculatorService implements  CalculatorServiceInterface
{
    public function add(int $a, int $b): int
    {
        return $a + $b;
    }
}
注:
@RpcService 共有 4 个参数:
name 属性为定义该服务的名称,这里定义一个全局唯一的名字即可,Hyperf 会根据该属性生成对应的 ID 注册到服务中心去;
protocol 属性为定义该服务暴露的协议,目前仅支持 jsonrpc 和 jsonrpc-http,分别对应于 TCP 协议和 HTTP 协议下的两种协议,默认值为 jsonrpc-http,这里的值对应在 Hyperf\Rpc\ProtocolManager 里面注册的协议的 key,这两个本质上都是 JSON RPC 协议,区别在于数据格式化、数据打包、数据传输器等不同。
server 属性为绑定该服务类发布所要承载的 Server,默认值为 jsonrpc-http,该属性对应 config/autoload/server.php 文件内 servers 下所对应的 name,这里也就意味着我们需要定义一个对应的 Server,我们下一章节具体阐述这里应该怎样去处理;
publishTo 属性为定义该服务所要发布的服务中心,目前仅支持 consul 或为空,为空时代表不发布该服务到服务中心去,但也就意味着您需要手动处理服务发现的问题,当值为 consul 时需要对应配置好 hyperf/consul 组件的相关配置,要使用此功能需安装 hyperf/service-governance 组件,具体可参考 服务注册 章节;
使用
@RpcService注解需use Hyperf\RpcServer\Annotation\RpcService;命名空间。
以上内容来自 文档
添加 server 适配 jsonrpc-http 协议。修改 config\autoload\server.php 文件
<?php

use Hyperf\Server\Server;
use Hyperf\Server\SwooleEvent;

return [
    // 这里省略了该文件的其它配置
    'servers' => [
        [
            'name' => 'jsonrpc-http',
            'type' => Server::SERVER_HTTP,
            'host' => '0.0.0.0',
            'port' => 9504,
            'sock_type' => SWOOLE_SOCK_TCP,
            'callbacks' => [
                SwooleEvent::ON_REQUEST => [\Hyperf\JsonRpc\HttpServer::class, 'onRequest'],
            ],
        ],
    ],
];
开始搭建 服务消费者
cd hyperf-consumer/
mkdir -p app/JsonRpc
将之前写好的接口复制到消费者里
<?php

namespace App\JsonRpc;

interface CalculatorServiceInterface
{
    public function add(int $a, int $b): int;
}
接下来就是消费服务了
<?php

declare(strict_types=1);

namespace App\Controller;

use Hyperf\Di\Annotation\Inject;

class IndexController extends AbstractController
{
    /**
     * @Inject()
     * @var \App\JsonRpc\CalculatorServiceInterface
     */
    protected $calculatorService;

    public function index()
    {
        $a = $this->request->input('a',3);
        $b = $this->request->input('b',6);

        return $this->calculatorService->add((int)$a,(int)$b);
    }
}
定义消费节点信息 config\autoload\services.php,需手动创建此文件
<?php

return [
    'consumers' => [
        [
            // name 需与服务提供者的 name 属性相同
            'name' => 'CalculatorService',
            // 服务接口名,可选,默认值等于 name 配置的值,如果 name 直接定义为接口类则可忽略此行配置,如 name 为字符串则需要配置 service 对应到接口类
            'service' => \App\JsonRpc\CalculatorServiceInterface::class,

            // 如果没有指定上面的 registry 配置,即为直接对指定的节点进行消费,通过下面的 nodes 参数来配置服务提供者的节点信息
            'nodes' => [
                ['host' => '127.0.0.1', 'port' => 9504],
            ],

        ]
    ],
];
修改消费者的端口号,以防冲突
'port' => 9502,接下来就可以分别启动 服务提供者和服务消费者,访问 9502 路由即可。
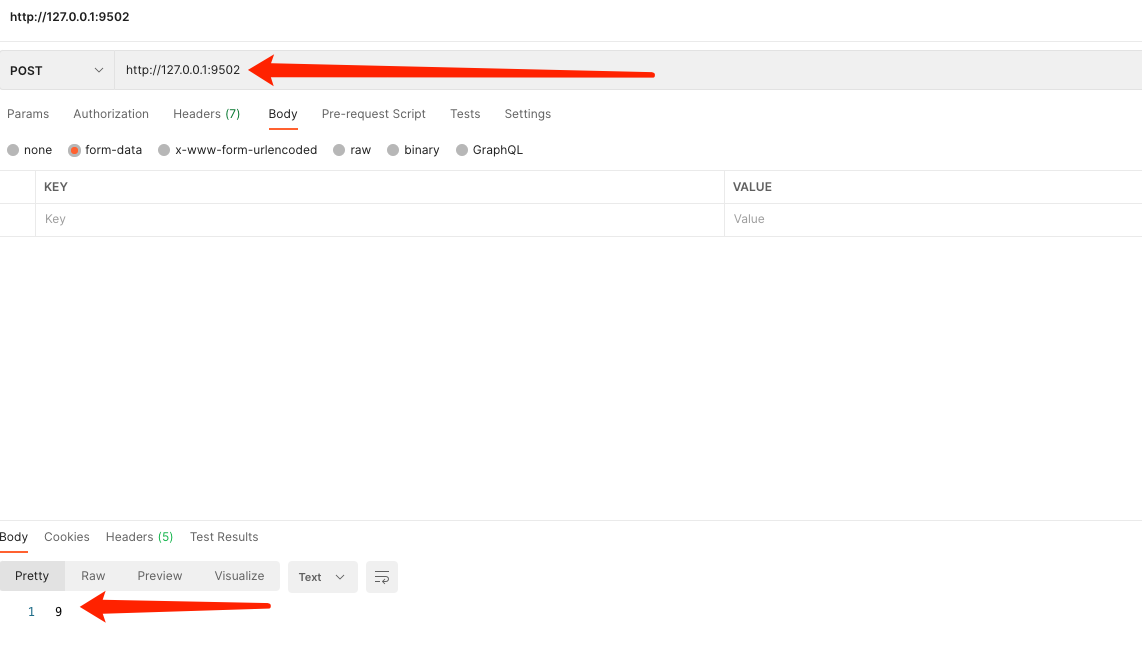
我们传入参数试下

将服务注册到注册中心
首先需要添加 publishTo
<?php

namespace App\JsonRpc;

use Hyperf\RpcServer\Annotation\RpcService;

/**
 * @RpcService(name="CalculatorService", protocol="jsonrpc-http", server="jsonrpc-http",publishTo="consul")
 */
class CalculatorService implements CalculatorServiceInterface
{
    public function add(int $a, int $b): int
    {
        return $a + $b;
    }
}
安装 Hyperf 服务治理组件,理论上按照上面的步骤,已经都安装了,不需要再次安装了
composer require hyperf/service-governance

composer require hyperf/service-governance-consul
发布 consul 配置文件
php bin/hyperf.php vendor:publish hyperf/consul安装 consul
https://www.consul.io/downloads.html
可以直接下载二进制文件进行安装,因我是 Mac ,因此采用 brew 进行安装
brew install consul启动 consul
brew services start consulok,接下来重启下 服务提供者
cd hyperf-provider
php bin/hyperf.php start
以上我们配置好了服务提供者,并进服务注册到服务中心,接下来 服务消费者从注册中心拉取服务进行消费 。修改 config/config\autoload\services.php 文件 添加 registry。并删掉或注释 nodes 配置项。
<?php

return [
    'consumers' => [
        [
            // name 需与服务提供者的 name 属性相同
            'name' => 'CalculatorService',
            // 服务接口名,可选,默认值等于 name 配置的值,如果 name 直接定义为接口类则可忽略此行配置,如 name 为字符串则需要配置 service 对应到接口类
            'service' => \App\JsonRpc\CalculatorServiceInterface::class,

            // 这个消费者要从哪个服务中心获取节点信息,如不配置则不会从服务中心获取节点信息
            'registry' => [
                'protocol' => 'consul',
                'address' => 'http://127.0.0.1:8500',
            ],

            // 如果没有指定上面的 registry 配置,即为直接对指定的节点进行消费,通过下面的 nodes 参数来配置服务提供者的节点信息
//            'nodes' => [
//                ['host' => '127.0.0.1', 'port' => 9504],
//            ],

        ]
    ],
];
OK,接下来重启服务消费者
php bin/hyperf.php start以上仅仅是基于官房文档进行了一次 rpc 调用。并且讲解了手动注册节点、以及使用 配置中心 consul 进行自动注册。
关于极客返利
极客返利 是由我个人开发的一款网课返利、返现平台。包含 极客时间返现、拉勾教育返现、掘金小册返现、GitChat返现。目前仅包含这几个平台。后续如果有需要可以考虑其他平台。 简而言之就是:你买课,我返现。让你花更少的钱,就可以买到课程。
版权许可
本作品采用 知识共享署名 4.0 国际许可协议 进行许可。转载无需与我联系,但须注明出处,注明文章来源 Hyperf 初体验 之 JSON RPC